Sending Checkmk notifications via Telegram
 on Feb 4, 2022
In this article you will learn how to use the popular messaging platform Telegram for sending notifications from Checkmk.
TL;DR:
Checkmk notifications can be sent via Telegram to combine real-time alerts with a widely used messaging platform.
- Telegram’s API allows easy, free, and cross-platform notification delivery, and scripts can mask sensitive information if needed.
- A custom notification script integrates with Checkmk, formats messages, and sends them using your bot token and chat ID.
- Making the script executable and restarting Apache enables Checkmk to use it, after which notification rules can be configured in the web interface.
Why send notifications via Telegram?
Telegram has a well documented API that is easily accessible and free of charge. In Addition, Telegram is very popular and many people are already familiar with the platform and technology. There are also apps for all major mobile platforms as well as desktop apps.
Are there any privacy concerns?
This article does not address the discussion about data privacy. This has already been done in detail elsewhere and can be read there. Typically, the data you submit with these notifications should not be privacy-sensitive. If it does, you have the option to choose an alternative method for your notifications.
Checkmk already offers a number of different methods out of the box, which can also be extended with procedures provided by the Checkmk community. At the end of this article you will also learn how to limit the output of information to a certain extent.
Getting started
What you need:
- A running Checkmk 2.0 site
- A Telegram bot
- The bot’s chat ID or a group ID you want Checkmk to send notifications to
The notification plug-in
To address Telegram from your Checkmk instance, you need a notification plug-in. This post uses a shell script created by filipnet.
Enable notifications
Retrieve and understand the script
To start, you need to log in as the instance user. The example site in this post is called 'telegram'.
omd su telegram
Then navigate to the folder in the local tree where the custom scripts for notifications are located.
cd ~/local/share/check_mk/notifications/
Now it’s time to download the actual script and place it in this folder. If you have Internet access from your site, you can use the following command for this, but it doesn’t matter how you place the file there.
wget --no-check-certificate https://raw.githubusercontent.com/filipnet/checkmk-telegram-notify/main/check_mk_telegram-notify.sh -O telegram.sh
You have the option to keep the original name or change it as you like. I have renamed the script to ‘telegram.sh’ using wget. Now let’s take a look at the script.
vim telegram.sh
You can use a text editor of your choice, I prefer vim.
This is the script’s header, which contains background information about the script, its author, and the license:

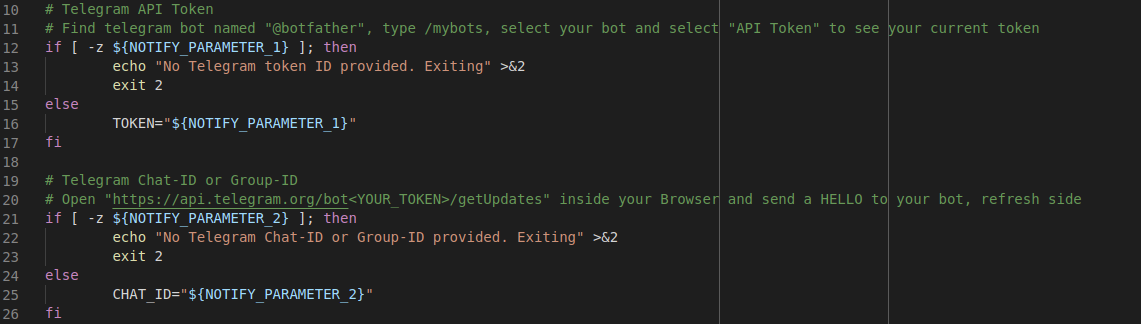
These are the authentication parameters from the Checkmk notification environment that are passed to the script. If the parameters are not specified in the notification rule, the script will terminate with an error:
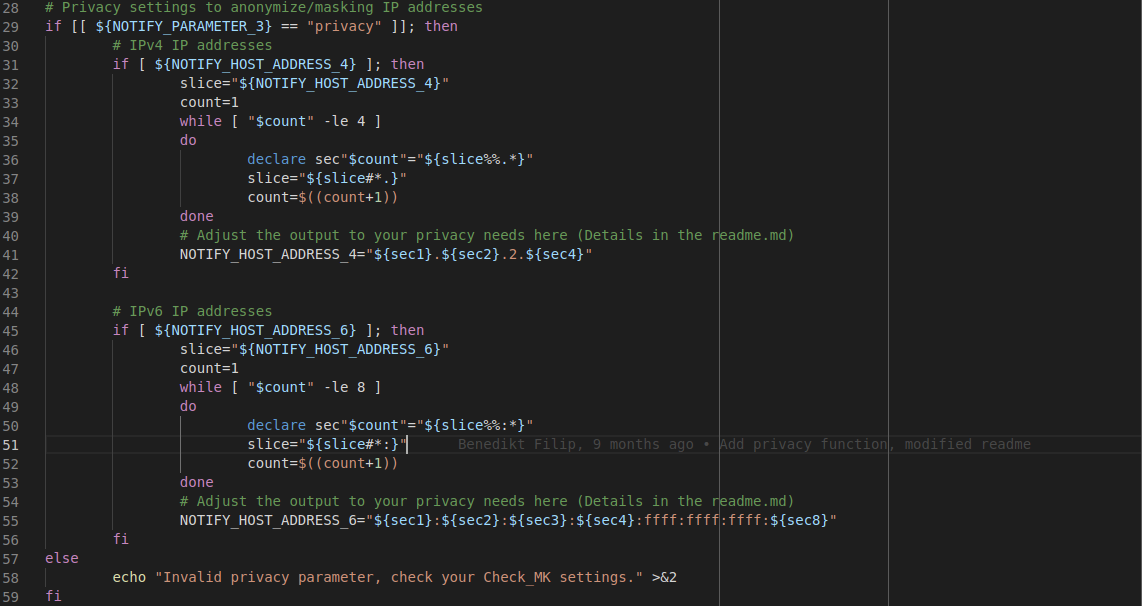
The following section is basically a privacy function to modify IP addresses if this is important for you. The script masks parts of the IP addresses or changes them completely so that a potential attacker cannot gain insight into the actual IP addresses. You can also customize the masking to suit your needs by modifying the script accordingly. However, this guide uses the unmodified code.
In the next section you can set icons for the different monitoring states. The author of the script provides default values, but also points out how you can change them.
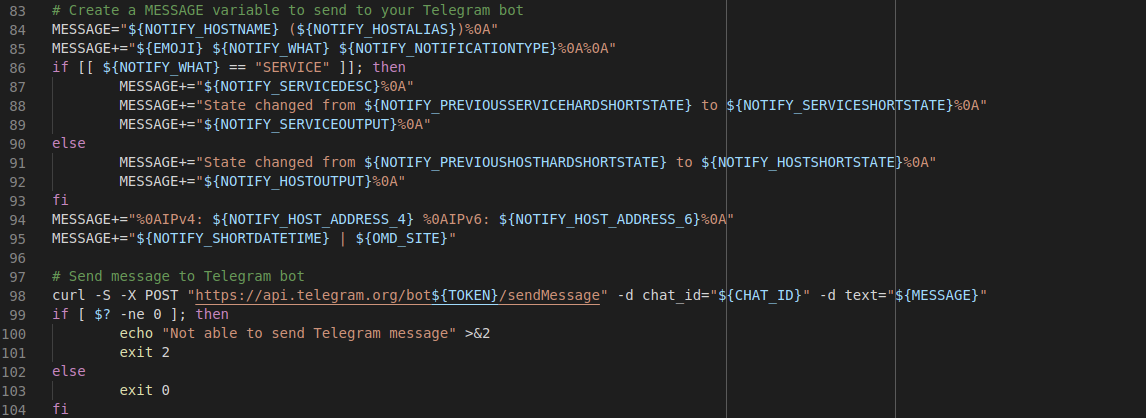
This is the interesting part of the script. Using the environment variables you provide in the notification context, the script creates the message and sends it. If sending fails, you will get an error message. This part is highly customizable, of course, but the default works well enough that you can proceed without making any changes.
Now that you’ve looked at the script and possibly customized it to your needs, you need to make it executable for the instance’s user and group, and restart Apache.
chmod ug+x telegram.sh
omd restart apache
This step is essential because Checkmk can only use the script if it is executable and after the instance’s Apache has been restarted.
Setting up the notification rule
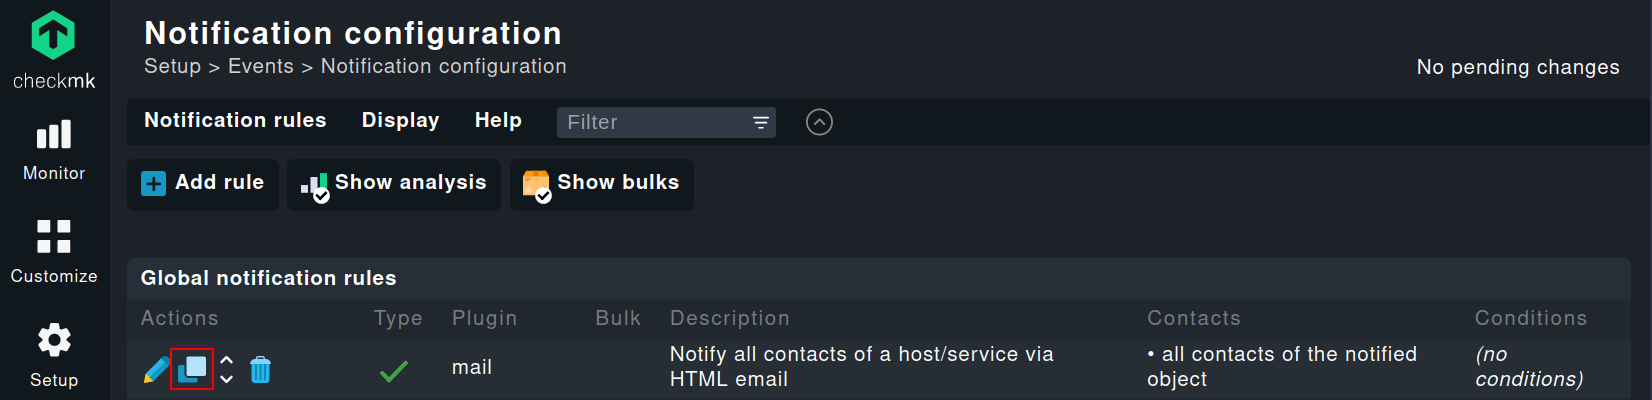
Now that everything has been completed under the hood, you can switch to the web interface and create your first Telegram-based notification rule. To do this, navigate to Setup ➳ Events ➳ Notifications and copy the built-in notification rule:
To avoid confusion, you should change the description in advance. For the ‘Notification Method’ select ‘Push Notification (using Telegram)’. If you were very attentive earlier, you may recognize the name of the ‘Notification Method’: it is the second line of the notification script. This is how Checkmk knows what to display in the configuration dialog. By the way, the first line is the so-called shebang, which tells the operating system how to run the script.
Now enter the necessary parameters, in exactly this order:
- Your Telegram bot token
- Your chat ID
- Optionally the already mentioned 'privacy' parameter
- For the field 'Contact Selection' leave the default setting.

Congratulations, you are done – at least almost. The last thing you need to do is make sure that your user is the contact for at least one host. How to do that is documented in detail in our manual.
Now, as soon as your host experiences a problem, you will be the first to know.
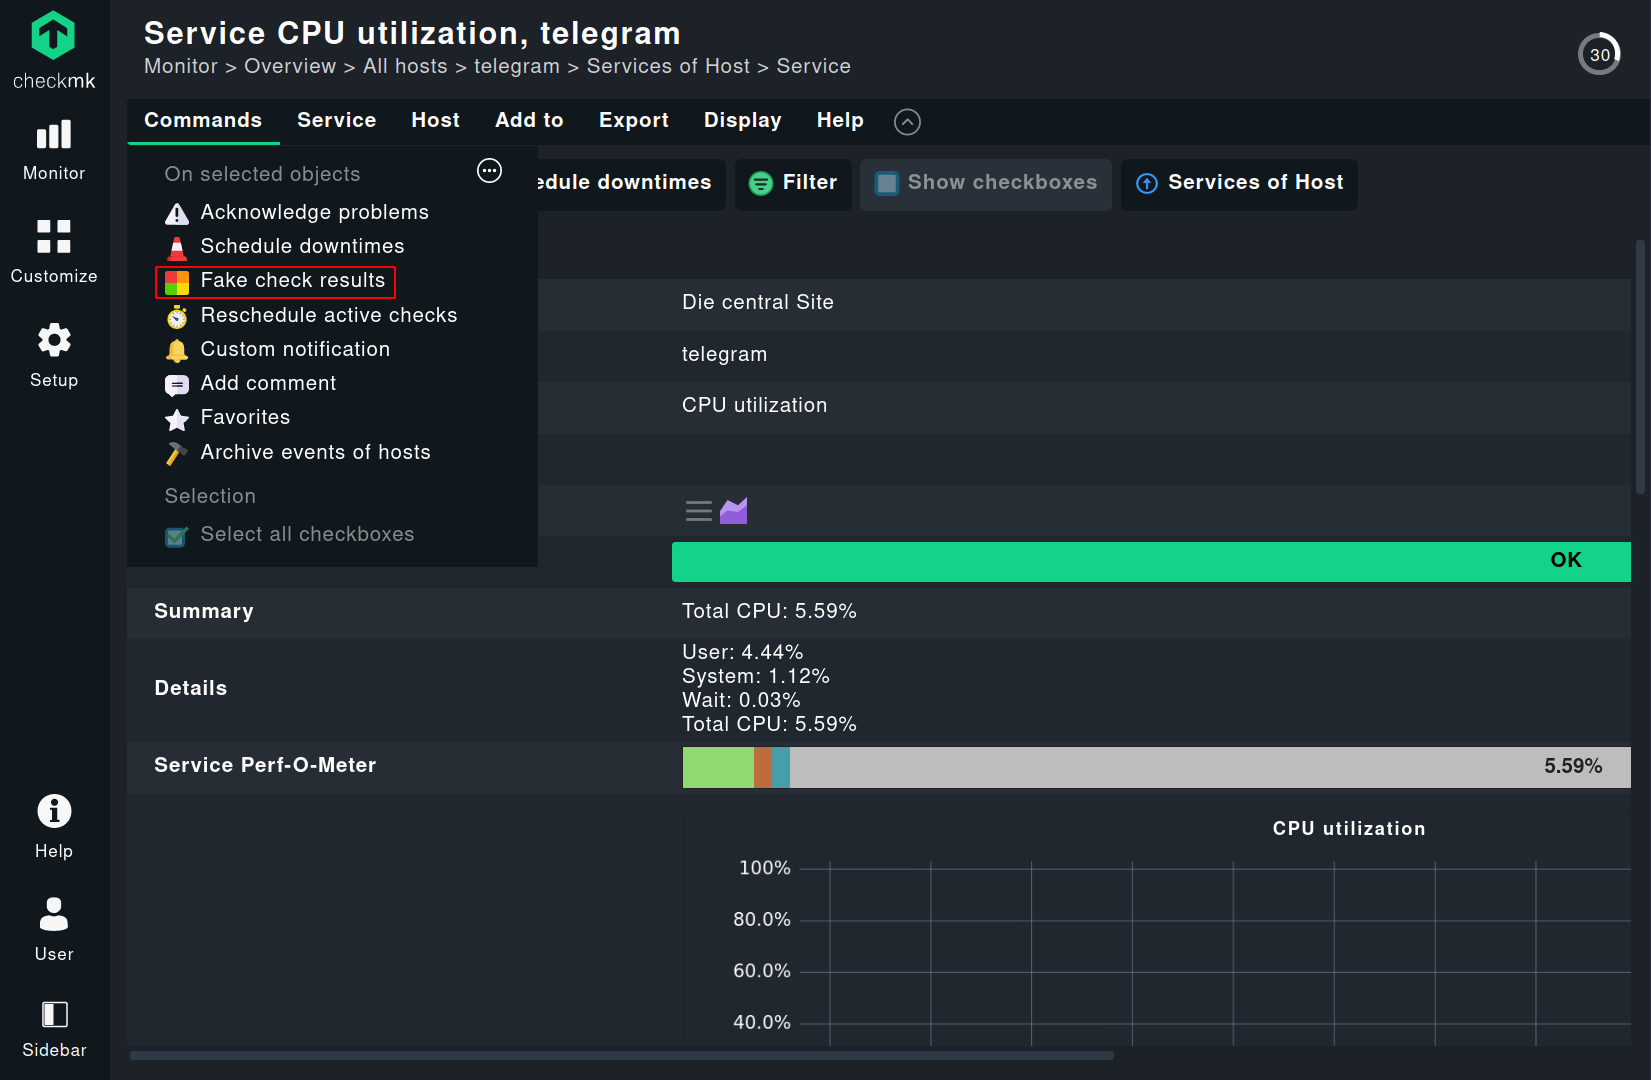
You can also immediately check if your notification settings are working: You can easily simulate check results. You might need to enable 'Show more' in the top right corner to see the option.
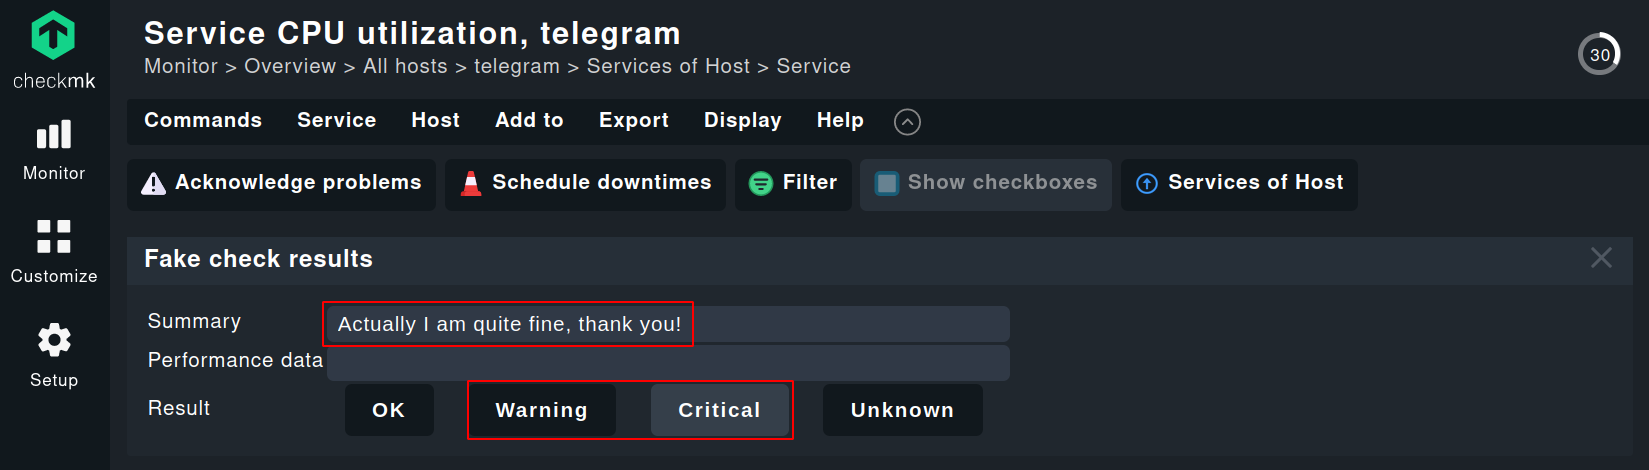
Now you can enter a meaningful message in the highlighted field and select the status you want to choose for notification. Ideally, you should select a critical or at least warning status for the simulated notification.
Summary
You have learned how to enable notifications from Checkmk via Telegram. With this foundation, you will be able to flexibly customize the notification format and extend it according to your needs. Furthermore, this is another example of both the great flexibility Checkmk offers and the strength of the open source community that provided the script used here.
For more information, please read the manual article on notifications.
