Secure your monitoring: Security best practices for Checkmk
 on Sep 29, 2022
One challenge in monitoring is the protection of monitoring data and user accounts. Both, data transfer and information storage, can create security risks that monitoring professionals should address. In this blog, I will share some best practices to help you configure your monitoring to be as secure as possible. You can implement most of the points in a few simple steps. The links provided will take you directly to the right chapters in the Checkmk user guide. Basically, Checkmk is built to be secure by design and secure by default. This already reduces possible threats. Nevertheless, there are some areas in Checkmk’s configuration that cannot be predefined by default, but have to be adjusted after the installation.
TL;DR:
This tutorial outlines the best practices for securing your monitoring system using Checkmk.
- Safeguard data transfers and user accounts by implementing strong authentication, encryption, and role-based access controls.
- Strengthen the monitoring infrastructure by securing network interfaces, limiting user privileges, updating components, and disabling any unnecessary services.
- Make sure to review and follow the recommended Checkmk configuration guidelines to minimize risks and ensure secure operations.
Use strong passwords for all accounts
You should always use strong passwords in Checkmk. This applies to Checkmk user accounts, but also to passwords that are used by the monitoring itself, for example to retrieve data via APIs. To generate strong passwords, for instance, you can use a password generator.
After setting up a new Checkmk site, two user accounts are configured by default: the automation user 'automation' and the administration account ‘cmkadmin’. The automation user is used to connect Checkmk to other systems and automate certain actions. To do so, external software must be able to retrieve certain URLs of the Checkmk interface automatically. The automation user enables authentication via certain variables in the URL. For this purpose, the automation user uses an automation password that you can create in Checkmk. You cannot use it to log in through the web interface, though.
For 'cmkadmin', Checkmk randomly generates a password when you create the Checkmk site. If you haven’t changed it already, adjust the password in the user interface. For local Checkmk user accounts, you can also enforce the usage of secure passwords. This option can be found in the Global settings of Checkmk.
Keep your Checkmk environment up to date
tribe29 regularly releases patches for all supported Checkmk versions. You should always install these updates as soon as possible. Besides new features, the patches serve to fix potential bugs and vulnerabilities. Checkmk’s update mechanism allows the parallel use of multiple Checkmk versions, so you do not run the risk of your monitoring environment not working after an update. Old versions maintain ready for use, and it is on you to decide, when want to remove them.
The publication of new Checkmk versions is announced by tribe29 in the monthly Checkmk newsletter and in the Checkmk forum. Visit the forum regularly or subscribe to the newsletter to stay up to date. In addition, you should not use major versions of Checkmk without active support. Therefore, keep an eye on the support periods of the Checkmk versions. As a rule, active support always ends six months after the release of a new version.
Create backups of your Checkmk configuration
In only a few minutes, you can create a backup of your Checkmk configuration. The option can be found under Setup -> Maintenance -> Backups. You can find more details in the instructions for backups in the Checkmk user guide.
Note that you can restore backup copies only if the Checkmk environment has the same version and the same edition as the backup. The underlying system platform, on the other hand, is not relevant to the backup: For example, if you have used Debian as your host system in the past, you can easily restore that Checkmk backup on RHEL.
Checkmk can encrypt backups, and you should use that feature, if you are not in full control of the location, in which you want to store the backup. If you, for example, store the backups in the cloud, you do not know, on which physical device your data is stored and should encrypt it, for sure.
Encrypt the communication of Checkmk agents with TLS
Since the Checkmk developers are constantly working on improving security, an update to a new major version often also entails new security mechanisms. The most recent example is the Agent Controller, which was implemented as a part of the Checkmk agents in version 2.1. It handles the transport of data collected by the agent script.
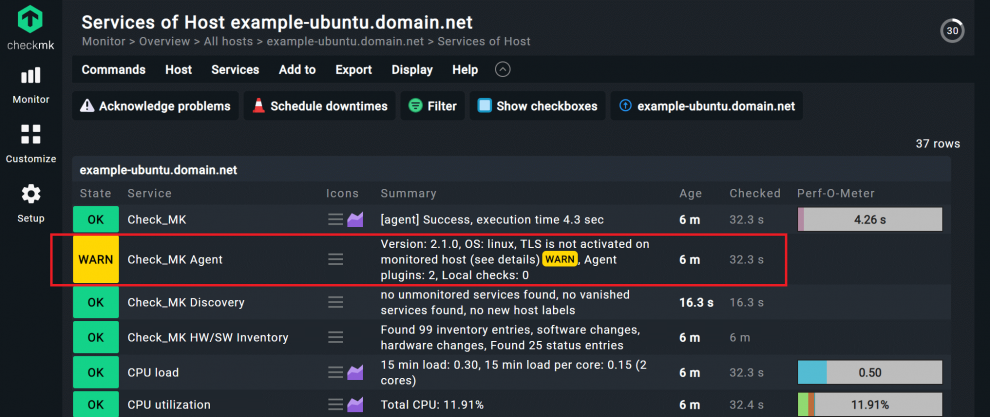
This is especially beneficial for server monitoring, as you can encrypt the communication between the agent and the Checkmk server using Transport Layer Security (TLS). To make the encryption work, you must install a current version of the agent on the monitored server and then register the agent in Checkmk. Agents always operate in unencrypted legacy pull mode before registration. That is easily recognizable by the fact that the monitoring service 'Check_MK Agent' shows a warning in Checkmk after recording the monitoring host of your monitored server.
An example for registering the Linux agent in Checkmk
In most cases, registration is done via a command on the terminal. For a Linux server, for example, it looks like this:
- Install the suitable Checkmk agent on the server you want to monitor and add the server as a host in Checkmk.
- Open the terminal that you want to monitor on your Linux server.
- Become root.
- Use the cmk-agent-ctl register command to register.
cmk-agent-ctl register --hostname <name of the host> \ --server <Checkmk server> \ --site <Checkmk site> \ --user automation cmk --password <automation secret>
- You can copy the command, but you have to adjust these items:
- After hostname, replace
<name of the host>with the name of the Linux server in Checkmk. - The
<Checkmk server>is the placeholder for the host server of your Checkmk site, you should add that here. You can also enter the IP address here. - After site, you enter the name of your Checkmk site and take out
<Checkmk site>. You can see it in the URL path of the GUI, it is usually the first word of the URL. - Under user, you should leave the automation user, as it is used exactly for such purposes.
- After password, you add the password of the automation user instead of
<automation secret>.
- After hostname, replace
- Once you have adjusted the necessary information, confirm the command.
For my host 'example-ubuntu.domain.net' the command looks like this:

- Execute the command. If the data is correct, you will be prompted to confirm the identity of the Checkmk site.
- Confirm with 'Y' to complete the process.
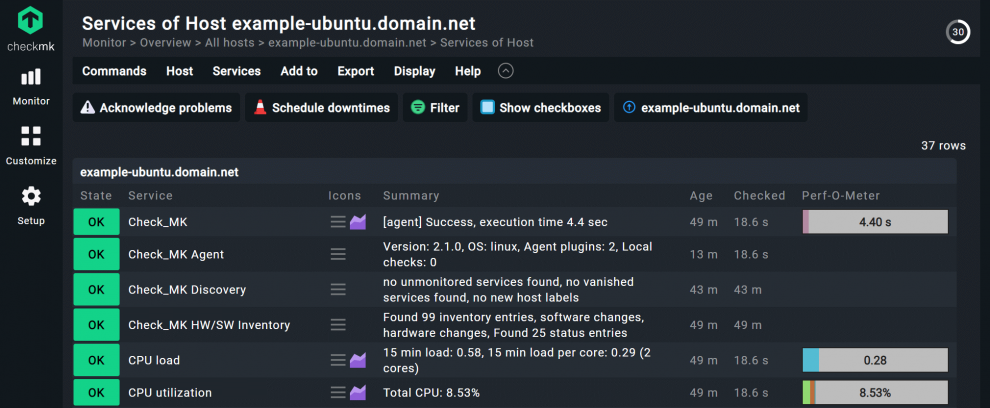
In my case, the registration was successful. The service 'Check_MK Agent' has changed its status to OK.
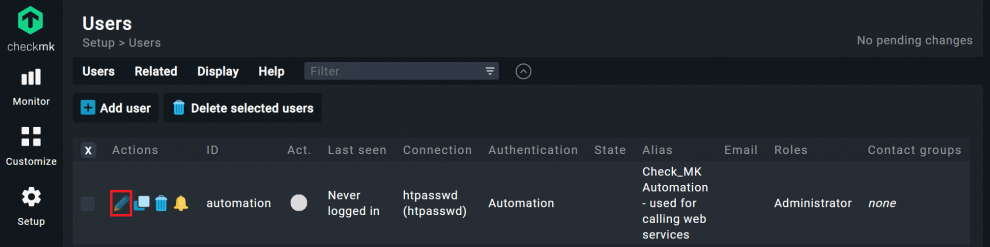
The password for the automation user can be found under Setup -> User. There, you click on the first icon under Actions. Then you can roll the dice for the password.
By default, Agent Controller supports the most common Linux distributions and Windows servers. For details, see the Linux monitoring user guide article or the Windows monitoring chapter.
If your host does not have a direct connection to the Checkmk server, or you want to register multiple hosts at once, you can register multiple hosts by using a proxy. The necessary steps can be found in the job registration chapter of the Checkmk user guide.
Check the access policies and configuration regularly
Under Setup -> Users you will find an overview of all Checkmk users and should regularly check their access rights. The goal is to implement the principle of least privilege. For example, if a user needs read-only privileges for an area, you should not grant him or her any privileges beyond that.
This principle also applies to the access rights of accounts that Checkmk itself uses for monitoring. For example, if you monitor VMware, you provide a VMware access account for vCenter and/or an ESXi host in Checkmk's VMware rule to retrieve the VMware API. However, you should always rely on read-only accounts, since anything else would be a security risk.
Since Checkmk version 2.1, you can check your security configuration in Checkmk under Setup -> Maintenance -> Analyze configuration by scrolling down to the Security item. Checkmk encrypts notifications, when they are being transfered inbetween Checkmk sites (enabled by default since version 2.1). If someone has changed relevant settings, you will see it here immediately.
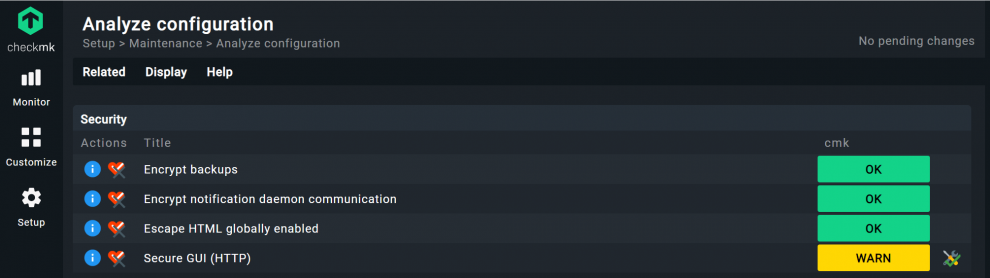
Secure Checkmk with HTTPS and 2FA
The screenshot shows that the HTTPS encryption of the Checkmk user interface is not enabled and thus issues a warning. Using HTTPS increases security and is the base for using two-factor authentication (2FA) in Checkmk. To be able to use 2FA, you need to adjust the VirtualHost configuration of your Checkmk host server. You can find the corresponding instructions in the chapter on HTTPS in the Checkmk user guide.
If you want to use 2FA afterwards, you need an authenticator that complies with the FIDO2/WebAuthn Internet standard in addition to your password. You can use a Yubikey, for example. The instructions for the implementation can be found in the chapter on two-factor authentication in the Checkmk user guide.
Final thoughts: Small steps, great impact
Administrators must always assume that a security breach will occur. That's why it's important to follow general security best practices, such as the use of strong passwords and regular updates, especially when monitoring. Checkmk also provides additional security mechanisms, such as TLS encryption of agents, which help to increase the level of protection even further. This blog summarizes the key steps and shows how to implement them in Checkmk.
