Setting up Checkmk as an alert source in iLert
 on May 12, 2021
In this blogpost I will explain how to set up your Checkmk monitoring as an alert source in iLert and then take your first steps in iLert. For this I am using the iLert trial version, which provides 14 days free use of a fully functional iLert. With Checkmk version 2.0 integrating Checkmk as an alert source into iLert is very easy. With older Checkmk versions the integration also works well, but with Checkmk 2.0 or newer versions you can use the native integration. The setup instructions for all versions can be found in the iLert documentation.iLert comes as software-as-a-service and is managed through a graphical web interface. You don't need to install any additional software and this guide is suitable for users without any previous experience of iLert. To start iLert, you will need a company email address and a recent version of a popular browser. You should also have admin access to the Checkmk instance that you want to integrate with iLert as an alarm source.
For this tutorial I am using the Checkmk Trial v2.0.0p3, which I have set up on Ubuntu 20.04. iLert does not actively intervene in the monitoring and does not have access to your hosts. You will only create a new rule for the alerts in Checkmk. Nevertheless, you can of course try the iLert integration first with a test instance of Checkmk.
Making Checkmk available as an alert source in iLert
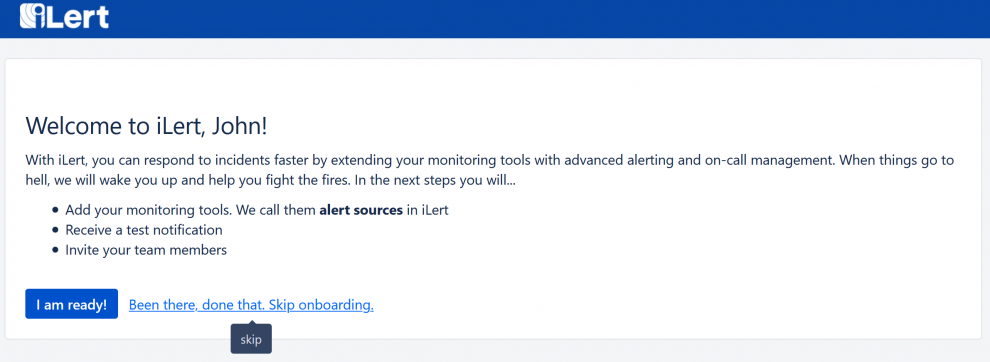
Create an iLert account on our website and log in to your iLert site via the browser. The trial version will be ready for immediate use. I would definitely recommend doing the onboarding when you first sign up, however I skipped it for this article due to time constraints and just want to focus on Checkmk here. Therefore, click on 'Been there, done that. Skip onboarding' and you will be taken directly to the iLert interface.
Click on Services ➳ Alert sources in the navigation menu. At this point you do not have an alarm source yet, so I click on the '+ Create the first alert source' button.
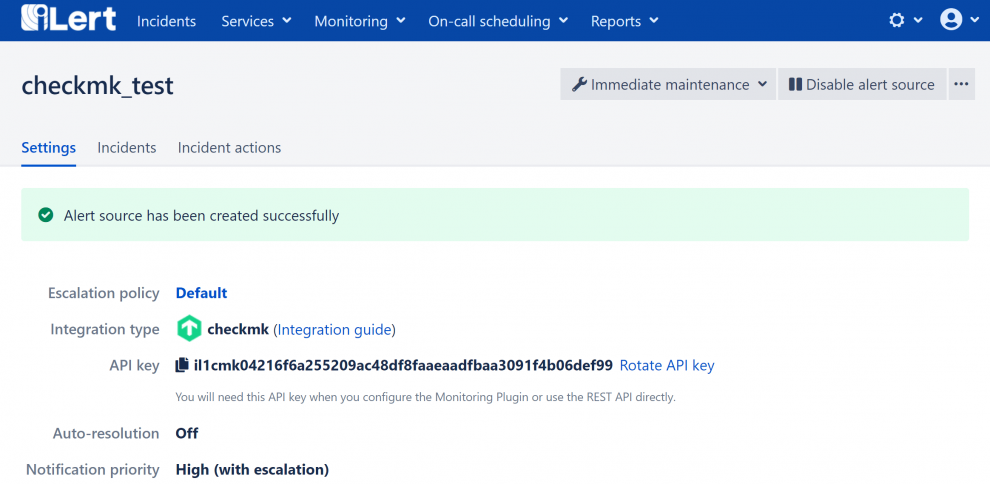
In the next window you will need to choose a name for your alert source, also set the Integration type to 'checkmk'. I call my source 'checkmk_test'. The rest you take over without any changes. Click on 'Save'.
Now you should be able to see the details for the alert source. Your iLert environment is now ready to receive alerts from Checkmk. Copy the API key, as you will need this right away to finalize the configuration in Checkmk.
Now you will need to configure your Checkmk to send alerts to iLert. You do this by creating a notification rule. To do so, go to Setup ➳ Events ➳ Notification configuration in your Checkmk user interface and then at the top of the panel click '+ Add rule'.
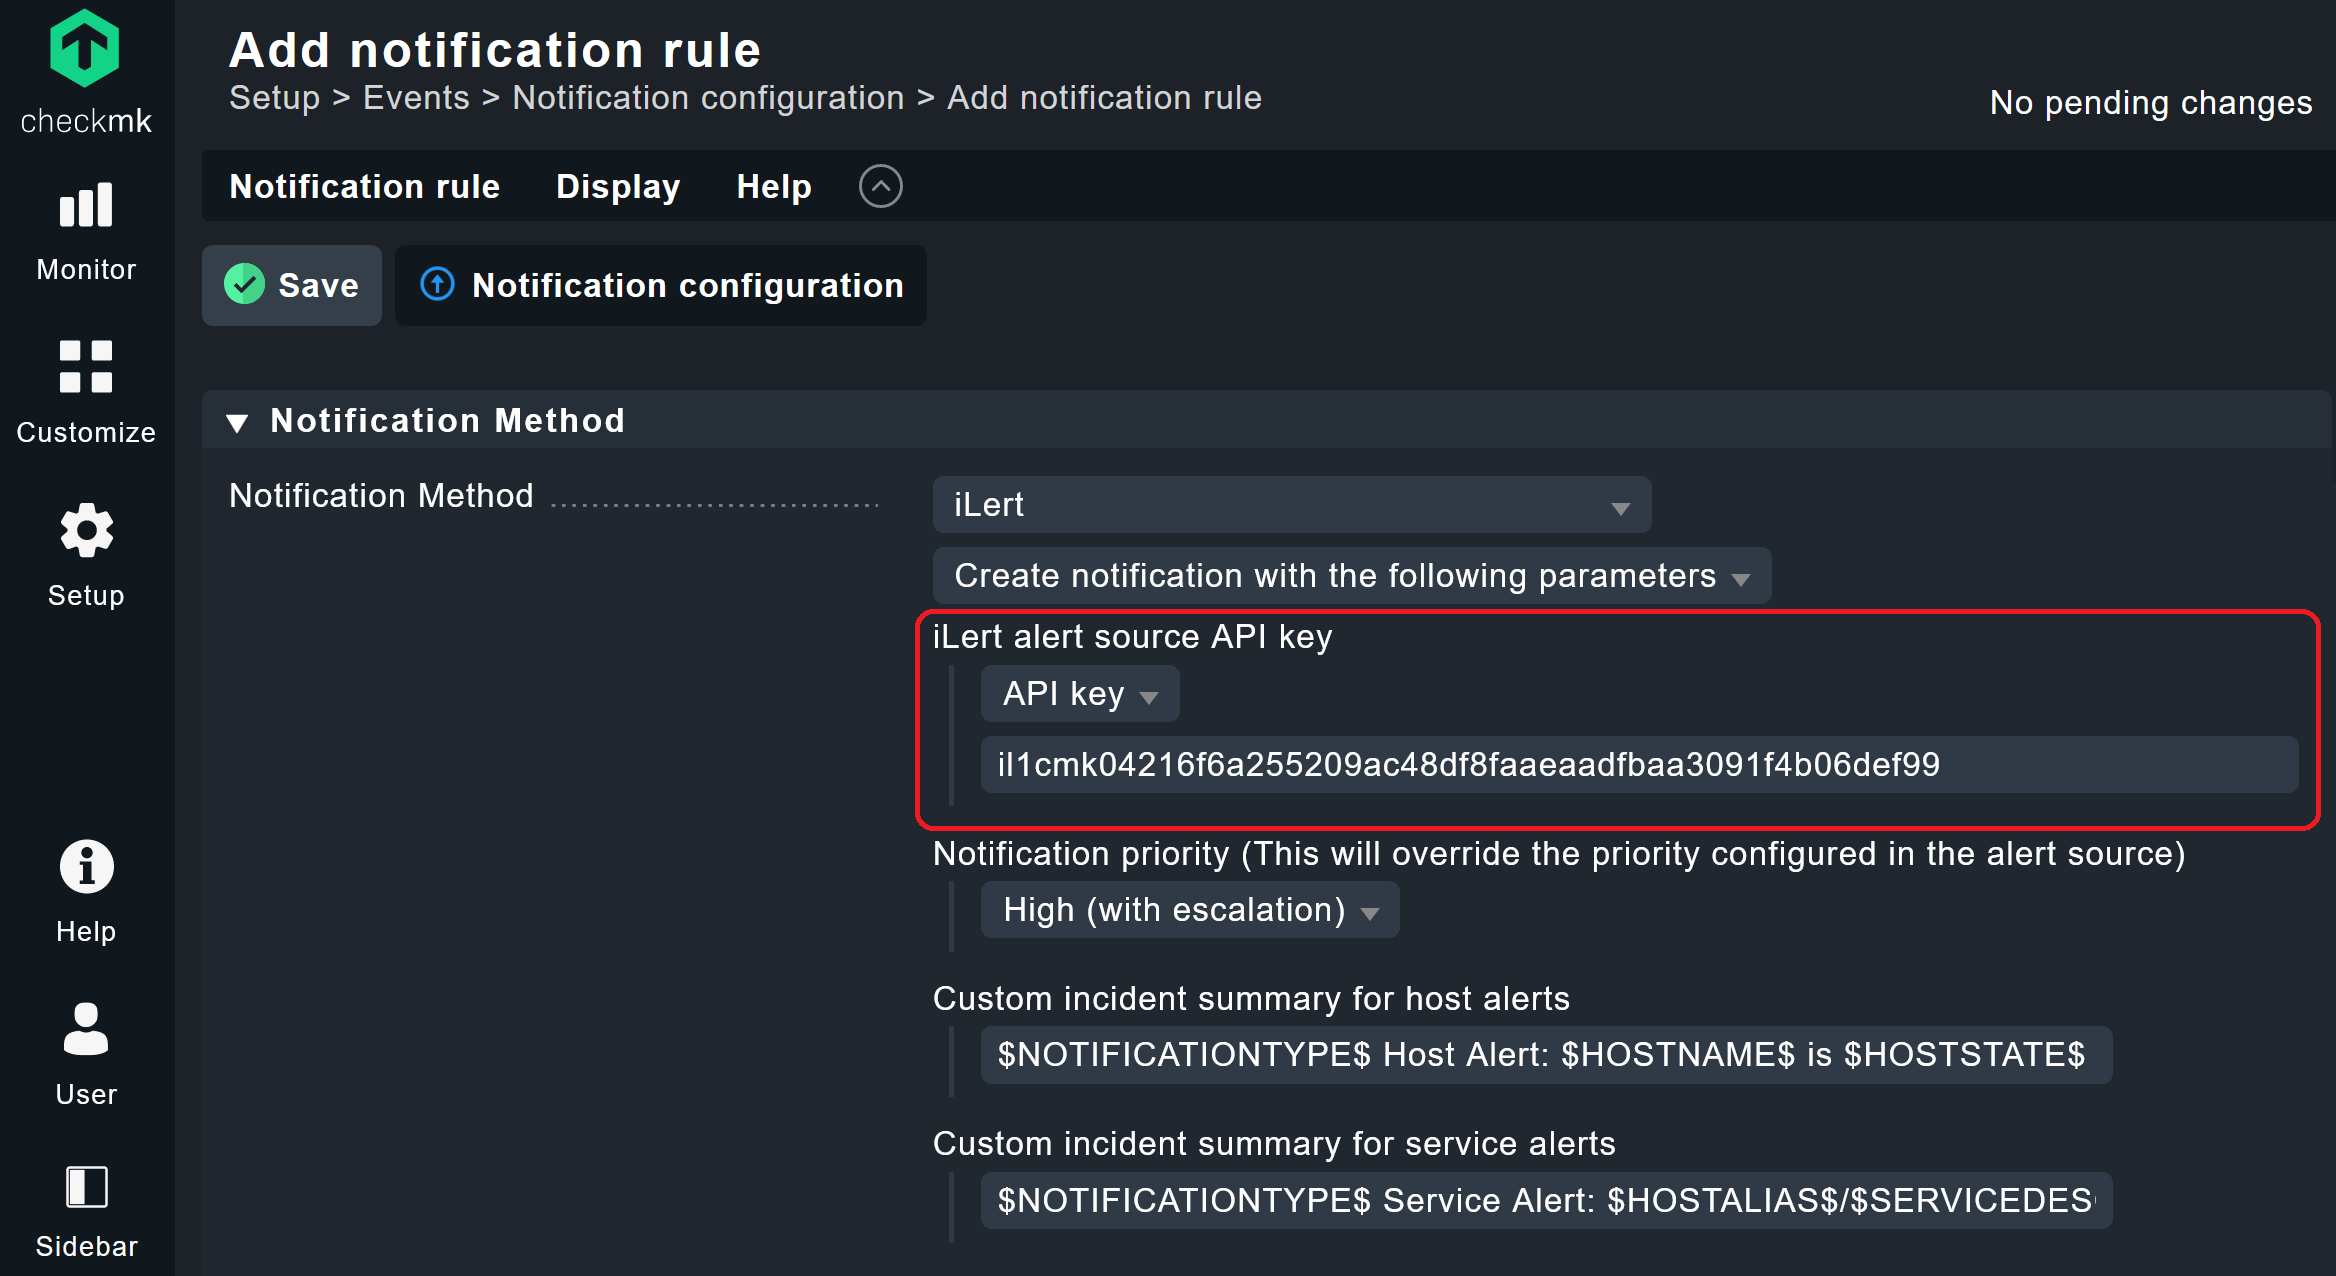
In the next window, set the Notification Method to 'iLert' and enter your previously-copied API key. You can of course also name the rule and add a comment as desired. In my example, I did not assign a name or a comment.
Save the rule and confirm the changes in Checkmk. The rule should then be visible under Setup ➳ Events ➳ Notification configuration. That's it in the Checkmk environment. Now Checkmk is available as an alert source in iLert.
Getting started in iLert
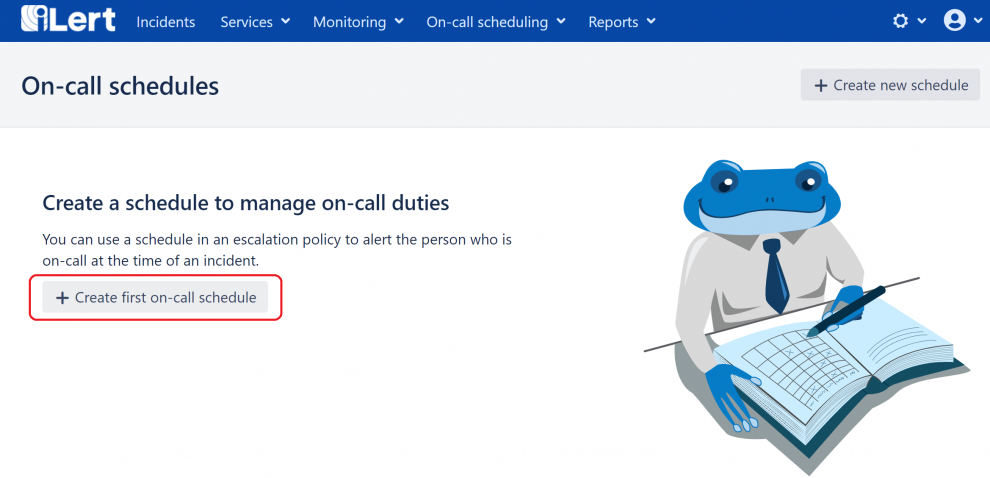
After you have integrated Checkmk as an alert source in iLert, I will show you how to create an on-call schedule in iLert in order to forward the alerts from Checkmk to the on-call staff. To do this, first invite additional colleagues into iLert by clicking on the gearwheel icon on the left and select Users. After that click on On-call scheduling ➳ On-call schedules and click on '+ Create first on-call schedule'.
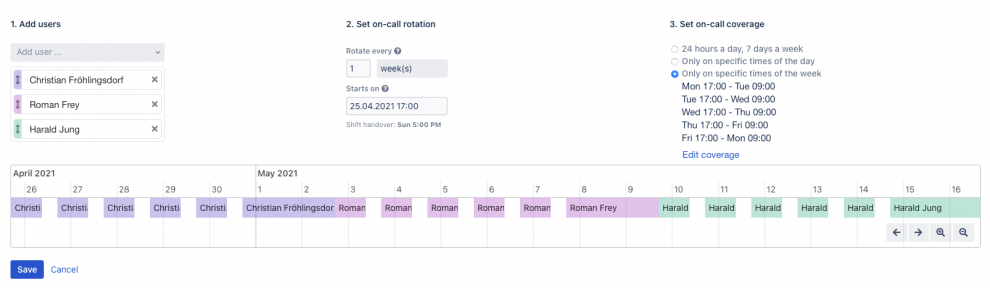
In the next dialog, select the ‘Create recurring schedule’. This has the advantage that the schedule is generated automatically after specifying the team members and desired shift rotation. At first you will see an empty schedule.
You can now store the working and on-call times of your employees. You can find detailed instructions about that in the iLert documentation. In my example, I have added three team members who rotate weekly and are on call outside the regular working hours of 9:00 to 17:00.
After that, you should still add an escalation policy to your on-call schedule that can be used by your Checkmk alert source. To do this, in the navigation menu, go to On-call planning ➳ Edit escalation policy. In this example, I find my new on-call schedule here. I select the on-call schedule for 'NOC Rufbereitschaft'.
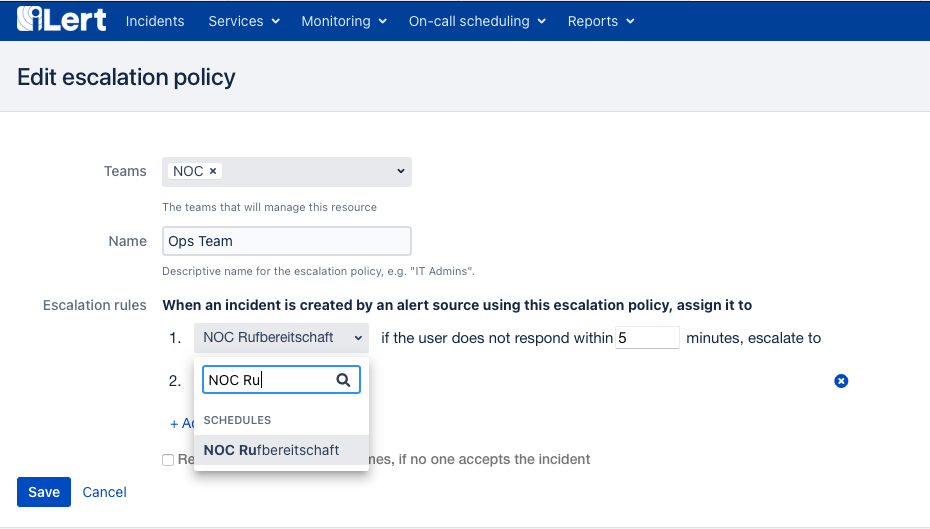
In the escalation policy you define which teams and persons iLert should alert and in which order and after which time alerts should be escalated. As soon as a person acknowledges the alarm, escalation and further alerting stops. Acknowledgement is particularly easy with iLert – it can be done on the same channel on which the alert was raised. For example, you can acknowledge a voice call alert immediately by pressing a button. This bidirectional alerting saves the employee time and allows them to respond to the problem immediately.
Finally, each team member should set their alert preferences in their own profiles. This can also be done directly in the iLert mobile app. So, those were the first steps in working with iLert. Not only did you add Checkmk as an alert source in iLert, but you immediately set up a simple alerting workflow with Checkmk in iLert.
For further reading, there is a chapter on Checkmk in the iLert documentation. I would of course also welcome your feedback – either as a comment below the blog or via the iLert contact page.
